
How to Test an AC Compressor
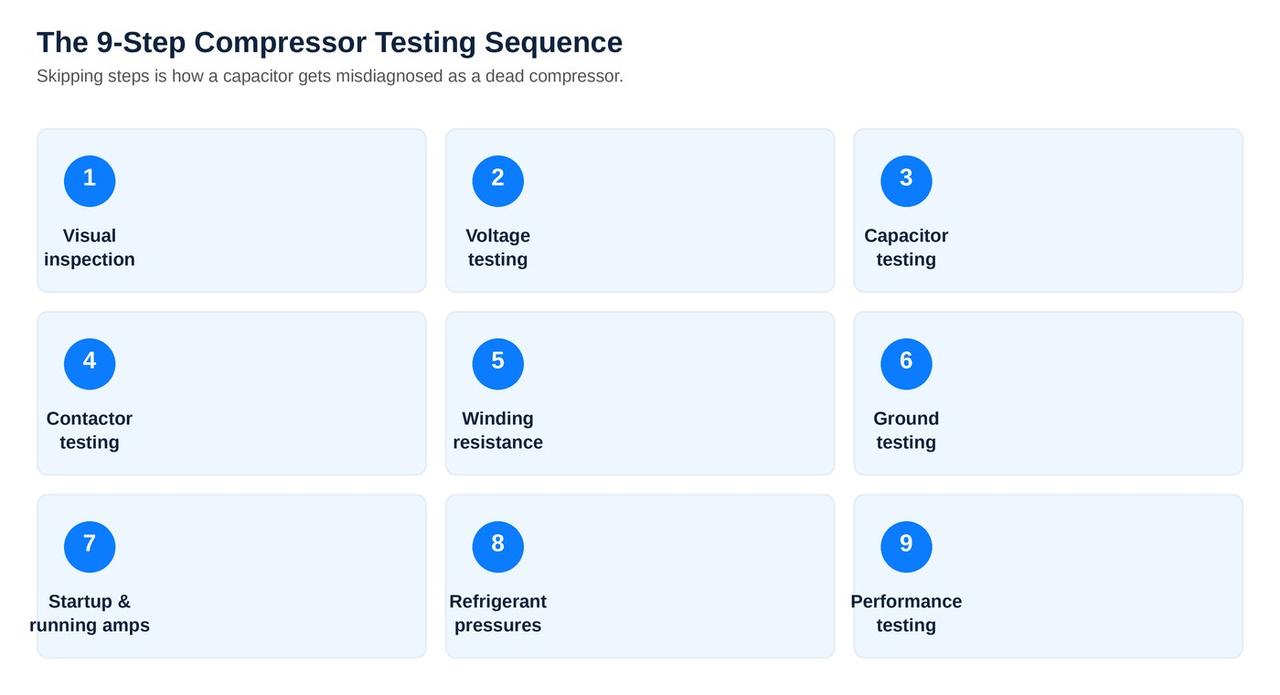
A complete compressor diagnosis checks electrical condition, startup performance, running amperage, refrigerant pressures, temperature behavior, and pumping ability. No single test proves every type of compressor failure.
This guide explains the professional testing sequence used to separate bad capacitors, contactor problems, voltage faults, grounded windings, open windings, locked rotors, weak pumping, refrigerant issues, and true compressor failure.
Texas HVAC License TACLB43277C.
Testing Sequence
Step 1: Visual Inspection
Inspect Electrical Terminals
- Burned compressor plug
- Melted wire insulation
- Loose push-on terminals
- Arcing or discoloration
- Corrosion at the terminal cover
Inspect the Refrigerant Circuit
- Oil stains
- Damaged suction insulation
- Rust or shell damage
- Loose mounting hardware
- Vibration marks or tubing rub points
Step 2: Test Supply Voltage
Voltage should be measured at the line side and load side of the contactor, both before startup and while the compressor is under load.
- Verify correct line voltage
- Check voltage drop through disconnect and contactor
- Check each leg to ground when appropriate
- Measure voltage during startup
- Inspect for unstable or low voltage
Low voltage can reduce starting torque and increase current. Excessive voltage drop can come from loose wiring, pitted contacts, damaged breakers, or undersized conductors.
Step 3: Test the Run Capacitor
The compressor capacitor must match the required microfarad rating and remain within the manufacturer's tolerance.
- Disconnect power
- Verify zero voltage
- Discharge safely
- Remove wires from the tested terminal
- Measure capacitance
- Compare with the label rating
Why This Test Comes Early
A weak capacitor can cause humming, high startup current, overheating, breaker trips, and failed starts that resemble a bad compressor.
Step 4: Test the Contactor and Wiring
- Verify contactor coil voltage
- Inspect for chatter or buzzing
- Check contact condition
- Measure voltage drop across closed contacts
- Inspect wire lugs and compressor terminals
- Confirm tight, heat-free connections
A contactor can click normally while still failing to deliver clean voltage under load.
Step 5: Test Compressor Winding Resistance
With power off and the compressor electrically isolated, resistance is measured between common, run, and start terminals.
| Measurement | Expected relationship | What it represents |
|---|---|---|
| Common to Run (C–R) | Usually the lowest reading | Run winding resistance |
| Common to Start (C–S) | Usually higher than C–R | Start winding resistance |
| Run to Start (R–S) | Approximately C–R plus C–S | Both windings in series |
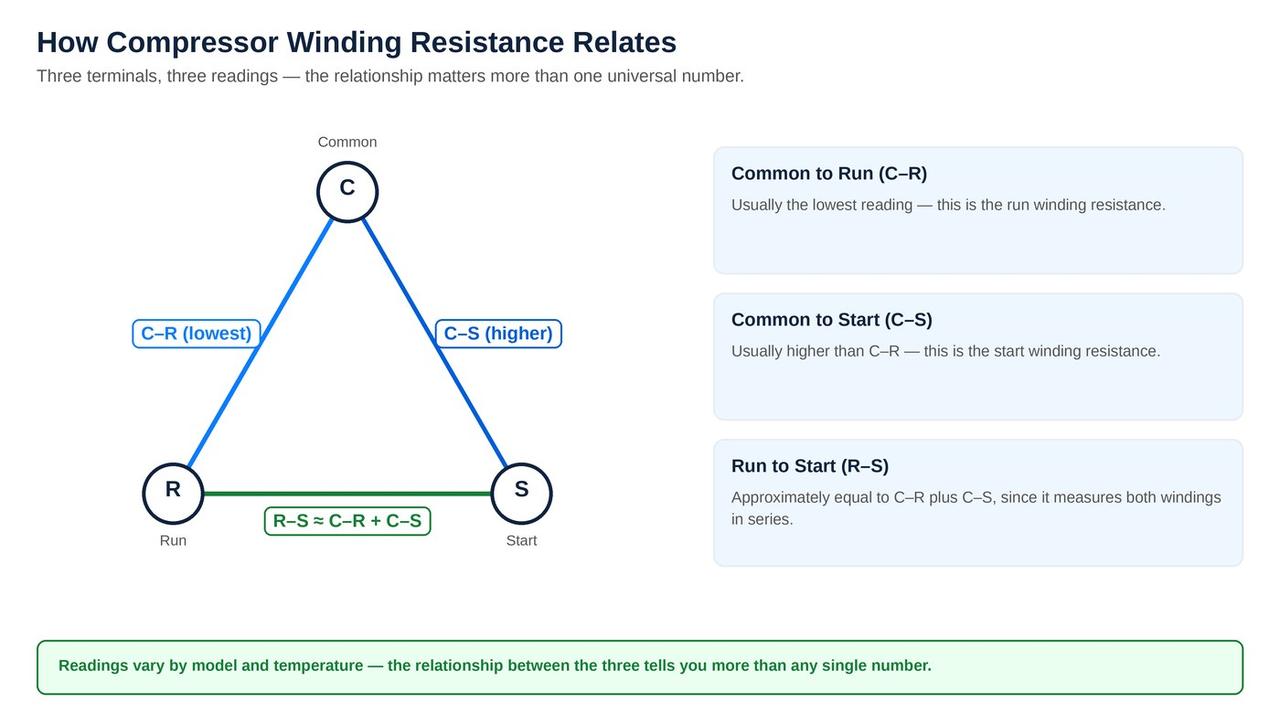
Readings vary by compressor model and temperature. The relationship between readings is often more useful than one universal ohm value.
Step 6: Test for a Grounded Compressor
Each compressor terminal is tested to the clean metal shell or a confirmed ground point.
- Common to ground
- Run to ground
- Start to ground
- Use an insulation resistance tester when appropriate
Open, Shorted, and Grounded Windings
| Condition | Typical test result | Important caution |
|---|---|---|
| Open winding | No continuity through one or more winding paths | Internal thermal overload may be open because the compressor is hot |
| Shorted winding | Resistance lower or relationships abnormal | Compare with model data and temperature |
| Grounded winding | Terminal shows continuity or low insulation resistance to shell | Usually requires compressor replacement |
| Normal winding resistance | Relationships appear correct | Mechanical lock or weak pumping may still exist |
Step 7: Measure Startup and Running Amperage
Electrical current provides valuable information about motor load and startup behavior.
- Measure inrush or startup current
- Compare with locked-rotor amperage
- Measure stabilized running current
- Compare with nameplate data
- Check voltage at the same time
| Current pattern | Possible meaning |
|---|---|
| Brief high current, then normal running amps | Normal acceleration |
| Current remains near LRA | Locked rotor, weak capacitor, low voltage, or severe pressure load |
| High running amps | High head pressure, overcharge, low voltage, mechanical stress |
| Low running amps with weak cooling | Low load, low charge, or weak compressor pumping |
| No current | Open circuit, overload, contactor, wiring, or open winding |
Step 8: Test Refrigerant Pressures and Temperatures
A compressor can test electrically normal but still pump poorly. Refrigerant performance testing helps identify mechanical weakness.
- Measure suction pressure
- Measure head pressure
- Convert to saturation temperatures
- Calculate superheat
- Calculate subcooling
- Measure discharge-line temperature
- Evaluate compression ratio
Pressure Patterns Matter
High suction with low head pressure can indicate weak pumping. Low suction with high head pressure can indicate a restriction. High head with high amperage can indicate condenser or charge problems.
Step 9: Test System Performance
- Measure return-air temperature
- Measure supply-air temperature
- Verify airflow and static pressure
- Inspect evaporator and condenser coils
- Check blower and condenser fan operation
- Verify system staging and controls
- Observe cycle stability
Compressor testing is incomplete if airflow and heat-transfer conditions are ignored.
Common Test Results Explained
Hums but Will Not Start
Possible causes include weak capacitor, low voltage, locked rotor, high pressure, or damaged windings.
Trips the Breaker
Possible causes include grounded winding, locked rotor, shorted wiring, severe high pressure, or incorrect breaker condition.
Normal Windings but No Start
Check the capacitor, voltage, contactor, overload, startup amperage, and mechanical lock.
Normal Electrical Tests but Weak Cooling
Evaluate refrigerant charge, restrictions, compressor pumping, airflow, and metering-device operation.
High Running Amps
Check head pressure, condenser airflow, overcharge, low voltage, and internal mechanical load.
Low Amps and Poor Compression
Internal valve wear or weak pumping may be present.
When Is a Capacitor or Contactor Enough?
A compressor may be healthy when:
- Winding and ground tests are normal
- Voltage is correct
- The compressor starts after the correct capacitor is installed
- Running amperage normalizes
- Refrigerant performance is acceptable
When Does the Compressor Need Replacement?
- Confirmed grounded winding
- Open or shorted internal winding
- Persistent locked rotor after correct electrical conditions
- Severely burned compressor terminal
- Internal valve or pumping failure
- Repeated overheating after external causes are corrected
- Severe burnout contamination
Need Compressor Testing in Spring or The Woodlands?
AC Repair Expo Heating & Cooling Inc provides compressor, electrical, refrigerant, and airflow diagnostics throughout Spring, The Woodlands, Tomball, Cypress, Conroe, Humble, Kingwood, and nearby North Houston.
- Voltage and capacitor testing
- Winding and ground checks
- Startup and running amp testing
- Pressure and temperature diagnosis
- Compressor pumping evaluation
- Repair-versus-replacement options
Frequently Asked Questions
How do you test an AC compressor?
Technicians test voltage, capacitor, contactor, winding resistance, ground faults, startup current, running current, refrigerant pressures, and pumping performance.
Can a compressor test electrically good and still be bad?
Yes. A compressor can have normal winding resistance but be mechanically locked or pump poorly.
What should compressor ohm readings look like?
C–R is usually lowest, C–S is higher, and R–S is approximately the sum of the other two readings.
How do you test for a grounded compressor?
Each terminal is tested to the compressor shell or ground using an ohmmeter or insulation resistance tester.
Can a bad capacitor make the compressor look failed?
Yes. A weak capacitor can cause humming, high current, failed startup, and overheating.
What does high startup amperage mean?
It may indicate locked rotor, weak capacitor, low voltage, or severe pressure load.
What does low compressor amperage mean?
It may indicate low load, low refrigerant, or weak pumping, depending on the pressure pattern.
What does high suction and low head pressure mean?
That pattern can indicate weak compressor pumping or internal valve leakage.
Should resistance be checked while the compressor is hot?
A hot compressor may have an open internal overload, so it may need to cool before final winding conclusions are made.
Can a grounded compressor be repaired?
The sealed compressor is usually replaced rather than repaired in the field.
Does a normal amp draw prove the compressor is good?
No. Pressure, temperature, airflow, and pumping performance still need to be evaluated.
When should I get a second opinion?
Get one before approving an expensive compressor replacement when the diagnosis was made without complete electrical and refrigerant testing.